The standing throw is one of the best places to begin teaching the shot put. It removes the complexity of the glide or rotational approach and lets the athlete learn the part of the throw that matters most: how to create force from the ground and transfer it through the body into the shot.
A beginner does not need ten technical cues. The athlete needs a safe setup, a clear movement goal, and enough quality repetitions to recognize what a connected throw feels like.
The goal is not to throw as hard as possible. The goal is to learn how the whole body moves the shot.
Safety comes first
Only throw in an approved shot put area with a clear landing sector. The coach or supervising adult controls when athletes may throw and retrieve. Never allow anyone to walk into the sector until every implement has landed and the coach has called the area clear.
- Use the correct implement for the athlete’s age and ability.
- Check that the circle, toe board, and landing area are clear and in good condition.
- Keep all athletes behind the thrower and outside the sector.
- Teach the athlete to put the shot from the neck—never throw it like a baseball.
Set the power position
The following directions describe a right-handed thrower. Reverse them for a left-handed athlete.
Place the feet slightly wider than shoulder width. The right foot is turned slightly inward and the left foot is placed a little closer to the toe board. The athlete should feel more pressure over the bent right leg while keeping both feet connected to the ground.
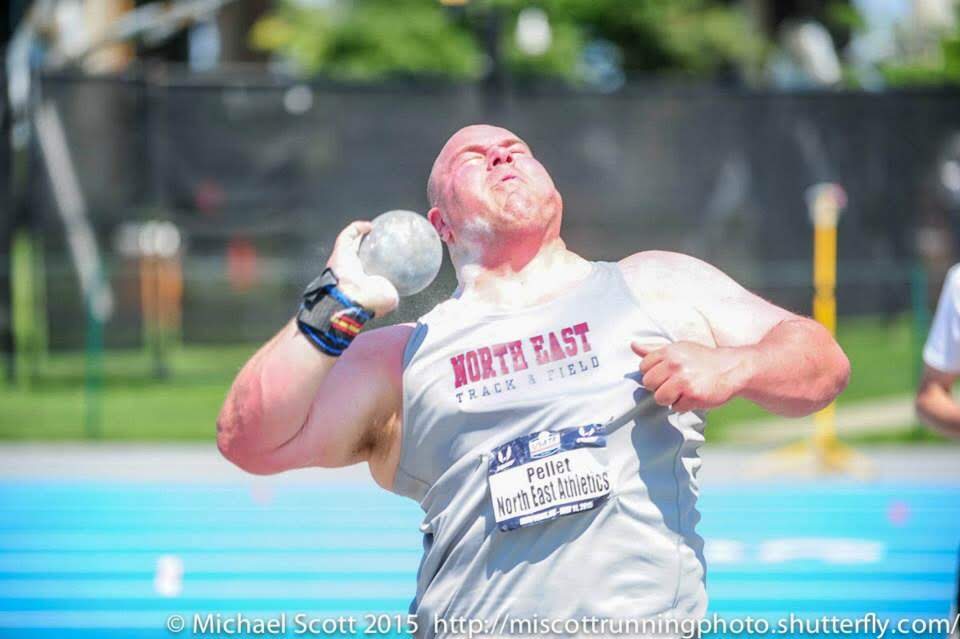
The shot rests against the neck beneath the jaw. The fingers support the shot, the thumb points down, and the elbow stays away from the ribs. The left arm is relaxed and helps establish direction and balance.
- Shot: touching the neck—not drifting away from the body.
- Lower body: pressure on the right leg with the hips slightly behind the shoulders.
- Posture: chest tall enough to turn and finish without collapsing.
Teach the throw in three steps
1. Turn from the ground
Ask the athlete to push through the right foot and begin turning the right knee and hip toward the sector. The lower body should start the action. This creates the beginning of separation between the hips and shoulders.
2. Meet a firm left side
As the hips turn, the athlete firms the left leg and left side of the body. This is the block. The block gives the force created by the legs and hips somewhere to transfer instead of allowing the athlete to continue drifting forward.
3. Finish up and through the shot
After the hips lead, the chest turns and the throwing arm finishes the movement. The athlete drives the shot up and out into the sector, then holds the finishing position for two seconds. A balanced finish is evidence that the athlete controlled the movement.
Ground first. Hip before shoulder. Finish against the block.
Use cues the athlete can feel
Choose one cue at a time. The best cue is the one that changes the athlete’s movement—not the one that sounds the most technical.
- “Push the ground away.”
- “Turn the belt buckle first.”
- “Make the left side strong.”
- “Finish tall.”
- “Hold your landing.”
Correct the most common mistakes
The athlete throws with only the arm
Return to a slower repetition without the shot. Have the athlete feel the right foot, knee, and hip begin the movement. Then repeat with the implement at a controlled effort.
The chest opens before the hips
Reduce the speed and use the cue “belt buckle first.” The athlete may also pause in the power position before starting the throw so the lower-body action is easier to organize.
The athlete falls through the toe board
Ask for a smaller, more controlled turn and a stronger left-side block. The throw is not complete until the athlete can hold the finish without stepping out of the front of the circle.
The shot drops away from the neck
Stop the repetition and reset the implement. Keep the shot connected to the neck until the final putting action. Never continue a drill with an unsafe carrying position.
A simple beginner practice prescription
- Rehearsal: 3 slow movements without an implement.
- Set 1: 4 standing throws at approximately 60–70% effort.
- Feedback: correct one priority—not every visible mistake.
- Set 2: 4 standing throws using the same cue.
- Finish: identify the best repetition and what made it successful.
Quality is more important than volume. Stop the set when fatigue causes the athlete to lose the safe shot position, balance, or the movement pattern being taught.
When should the athlete progress?
The athlete is ready for a more dynamic drill when the standing throw becomes repeatable. Look for a stable starting position, lower-body initiation, a firm block, a legal release, and a balanced finish.
The next step might be a step-back throw, a South African drill, or the first part of the athlete’s chosen full technique. The progression should add only enough movement to challenge the athlete without losing the foundation established in the standing throw.
Teach the finish before adding speed across the circle. A beginner who understands how to use the ground, lead with the hips, and finish against a firm block has a foundation that can support every future stage of shot put development.